
Design a Gallery Wall
Making an Impact with Your Gallery Wall: Tips with Stanley Street Studio Art Prints
Hey there, fellow home enthusiasts! Ready to transform your living space into an art lover’s dream? If you’ve been eyeing that blank wall in your living room or hallway and wondering how to turn it into a statement piece, you’re in the right place. Let’s dive into creating a stunning gallery wall using the fabulous art prints from Stanley Street Studio.
Why a Gallery Wall?
First things first, why should you even consider a gallery wall? Well, it’s simple. Gallery walls are the perfect way to showcase your personality, interests, and style. They’re dynamic, versatile, and can be easily updated over time. Plus, they’re a fantastic conversation starter!
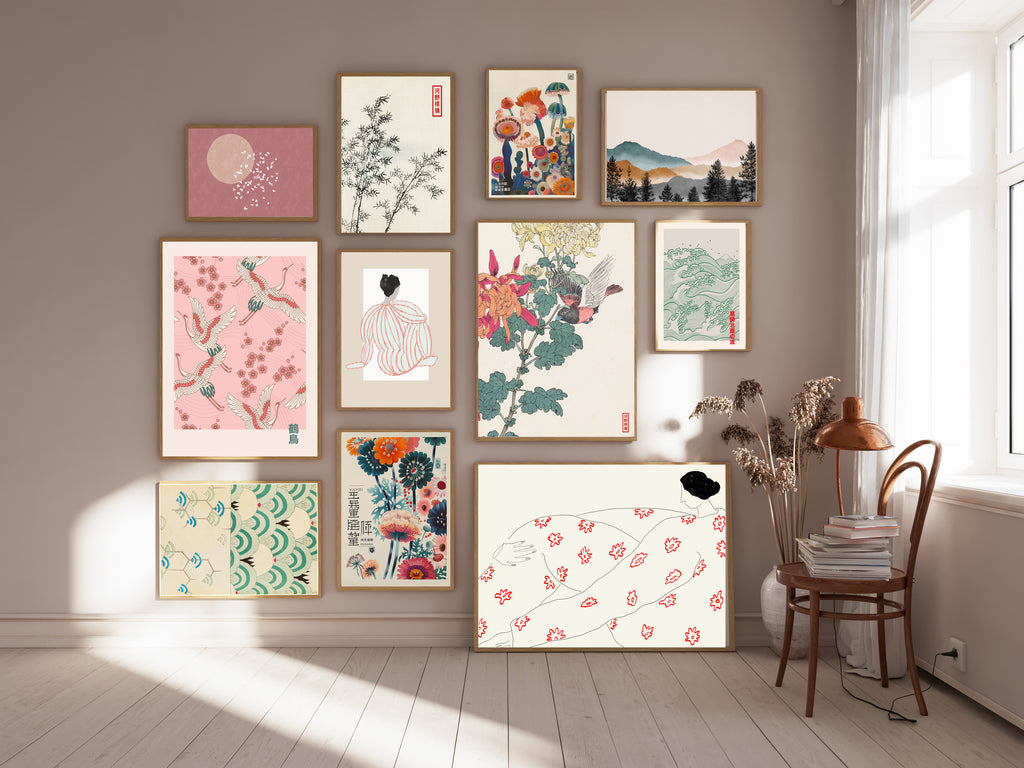
Choosing Your Prints
Stanley Street Studio has an incredible collection of art prints that cater to all tastes. Whether you’re into abstract art, botanical prints, or modern minimalism, there’s something for everyone. Here’s how to get started:
-
Find Your Theme: Do you want a cohesive look or a more eclectic mix? Deciding on a theme or color scheme can help narrow down your choices. For instance, a collection of black-and-white prints can create a sleek, modern look, while a mix of colorful botanicals can bring a lively, vibrant vibe.
-
Mix and Match Sizes: Don’t be afraid to play with different sizes and orientations. Stanley Street Studio offers a variety of sizes, which is perfect for adding visual interest. Combine larger statement pieces with smaller accent prints for a balanced look.
-
Personal Touch: Mix in some personal pieces too. Your gallery wall doesn’t have to be all about the art prints. Include family photos, travel souvenirs, or even some quirky knick-knacks. This adds a unique and personal touch to your display.
Planning Your Layout
Before you start hammering nails into the wall, take some time to plan your layout. Here are a few tips:
-
Lay It Out: Clear some space on the floor and arrange your prints there first. This way, you can play around with the arrangement until you find something you love.
-
Use Paper Templates: Cut out paper templates in the sizes of your prints and tape them to the wall. This allows you to visualize the arrangement and make adjustments without committing to any holes.
-
Spacing: Consistent spacing is key. Aim for about 2-3 inches between each piece. This keeps the look cohesive and organized.
Hanging Your Prints
Now comes the fun part—hanging your prints! Here’s how to do it like a pro:
-
Start with the Anchor Piece: Begin with the largest or most central piece and build outwards. This helps to create a focal point and makes it easier to balance the rest of your pieces around it.
-
Level Up: Use a level to ensure your prints are straight. Nothing ruins a gallery wall faster than crooked frames!
-
Command Strips: If you’re worried about making too many holes in the wall, Command strips are a lifesaver. They hold strongly and come off cleanly if you need to make adjustments.
Finishing Touches
Once all your prints are up, take a step back and admire your work. Adjust any pieces as needed, and don’t be afraid to tweak the arrangement over time. Your gallery wall should evolve with you!
Show It Off!
Your new gallery wall isn’t just for you—it’s meant to be shared. Snap some photos and show off your masterpiece on social media. Tag Stanley Street Studio and inspire your friends and followers to create their own art-filled spaces.
Creating a gallery wall with Stanley Street Studio art prints is a fantastic way to add a personal, stylish touch to your home. So go ahead, get creative, and let your walls do the talking!
Happy decorating! 🖼️✨